> return을 하면 function은 작동을 멈추고 결과 값을 return하고 끝나버린다.
예
1. return을 쓰지 않았을 때
const age = 21;
function caculateKrAge (ageOfForeigner) {
    ageOfForeigner + 2;
}

const krAge = caculateKrAge(age);

console.log(krAge);
결과값이 나오지 않는다.
2. return을 쓴다면
const age = 21;
function caculateKrAge (ageOfForeigner) {
return ageOfForeigner + 2;
}
const krAge = caculateKrAge(age);
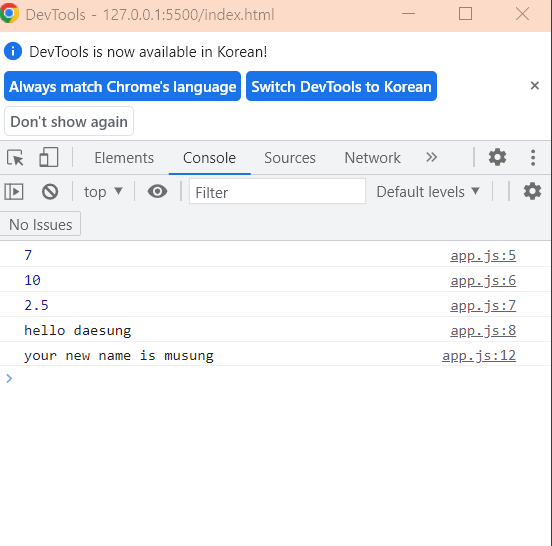
console.log(krAge);
결과값이 나온다.
이 내용을 해석하자면
const age = 21;
function caculateKrAge (ageOfForeigner) {
    return ageOfForeigner + 2;
}

const krAge = caculateKrAge(age);

console.log(krAge);

// krAge가 function calculateKrAge가 되는데
// function의 인수가 age고 age는 21
// 따라서 21이 function의 ageOfForeigner이 된다.
// 그렇게 하면 function 내에서 계산을 해서 21 + 2 를 해서 23을 만들고
// 이걸 다시 function을 시작한 곳에다가 보낸다.
// 그러면 calculateKrAge가 23이 되고
// 그걸 console로 찍는거다.
이 방법을 적용해서 하나 더 이해해보기
const calculator = {
    plus: function (a, b){
        return a + b;
    },
    minus: function (a, b){
        return a - b;
    },
    times: function (a, b){
        return a * b;
    },
    divide: function (a, b){
        return a / b;
    },
    power: function (a, b){
        return a ** b;
    },
};

const plusResult = calculator.plus(2, 3);
const minusResult = calculator.minus(plusResult, 10);
const timesResult = calculator.times(10, minusResult);
const divideResult = calculator.times(timesResult, plusResult);
const powerResult = calculator.power(divideResult, minusResult);
prompt
> 아주 오래된 방법
> prompt로 사용자에게 어떤 창을 띄워주고 사용자가 말하는 걸 저장할 수 있다.
예
const age = prompt("How old are you?");

console.log(age);
이런 창이 뜬다. 근데 이 방법은 아주 오래된 방법이라서 요즘에는 잘 안 쓴다고 한다.
어쨌든 여기다가 만약에 232323을 넣는다. 그러면 console 창에
이런 식으로 뜨는데 그런데 이것의 타입이 숫자일까?
이게 무슨 타입인지 알고 싶으면 typeof를 쓰면 된다.
console.log(typeof age);

//typeof 변수의 타입을 보는 거라서
//변수가 무슨 타입인지 헷갈릴 때 사용하면 된다.
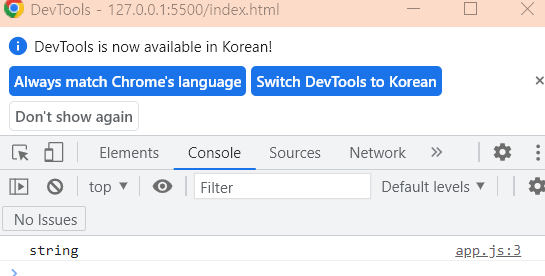
실행하면
string으로 뜬다.
그렇다면 string을 number로 바꿀 수는 없을까? ("23" > 23 이런 식으로)
parseInt 를 사용하면 된다.
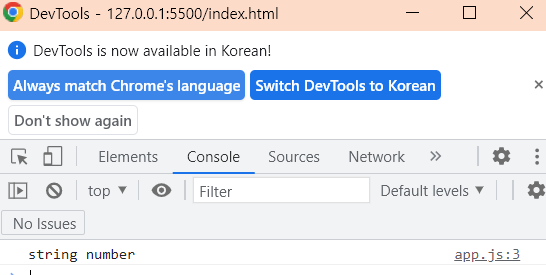
console.log(typeof "15", typeof parseInt("15"));
그런데 parseInt() 이 괄호 사이에 "123" 과 같이 안 넣고 "dsdsd" 이런 식으로 넣으면
NaN이 나오는데 이건 not a number 이라는 뜻으로 parseInt() 는 "123" 이런 형식의 string 만 숫자로 바꿔줄 수 있다.
number인지 아닌지는 isNaN (< 해석하면 is not a number이라는 뜻)이라는 function을 통해서도 가능하다.
const age = parseInt(prompt("How old are you?"));

console.log(isNaN(age));

// age를 prompt로 사용자에게 물어보고 얻는 답을 parseInt로
// 변환하고
// console로 찍어보는데 그 전에 isNaN을 통해서 age가 number이 맞는지 확인한다.
이게 무슨 말이냐 하면
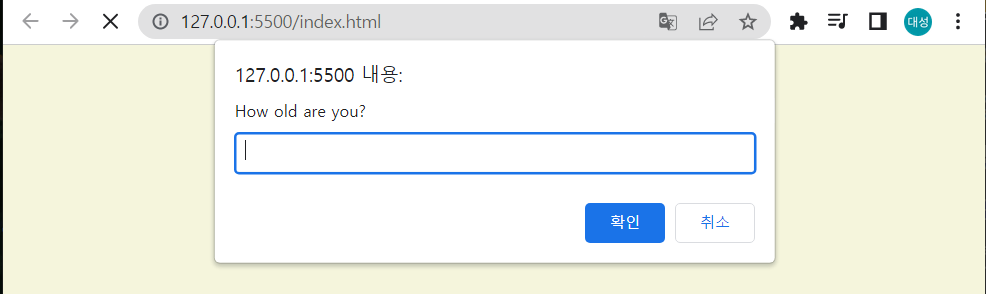
실제로 저걸 구현해보면
이런 식의 창이 나올텐데
거기서 내가 만약에 숫자 15를 넣는다고 하면
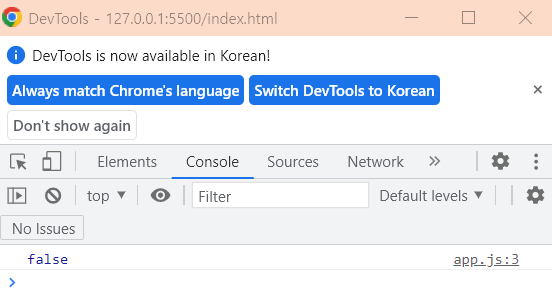
console 창에 다음과 같이 뜬다.
isNaN의 결과값은 boolean으로 나타난다.
따라서 결과값이 숫자가 아니라면 true로 나타나고 숫자라면 false로 나타나는거다.
위의 결과는 숫자를 내가 입력했기 때문에 console 창에 결과로 false가 나온 것이다.
if(condition)
> condition은 boolean이어야 한다.
const age = parseInt(prompt("How old are you?"));

console.log(isNaN(age));
/// isNaN(age) 는 boolean으로 값을 준다.
/// 따라서 condition에 들어가는 거 가능.

if (isNaN(age)) {
    console.log("Please write a number.")
} else {
 	console.log("Thank you for writing your age")
}

// 여기서 사용자가 숫자를 치면 console 창에 아무 것도 뜨지 않고, 문자를 치면 console 창에 Please write a number.
// if 문은 안에 있는 condition이 true면 활성화
// 그게 아니면 else로 넘어가서 실행
> else if로 condition을 하나 더 추가하면서 코드를 작성할 수도 있다.
const age = parseInt(prompt("How old are you?"));

if (isNaN(age)) {
    console.log("Please write a number.");
} else if(age < 18) {
    console.log("You are too young.")
} else {
    console.log("You can drink.")
}
해석 if
1.
일단 입력하는 칸에다가 hahahahhah이걸 치면 parseInt가 number로 바꿔주지 못한 채로 if로 넘어간다.
그 age 값이 숫자가 맞는지 확인한다. hahahahhah는 숫자가 아니기 때문에 if 의 (condition)이 true. true기 때문에
Please write a number을 console 창에 띄운다.
2.
숫자 12를 입력했다면 isNaN 여기서 false가 되고 if가 false 이기 때문에 else if로 넘어가는데 이 때 12는 18보다 작기 때문에 True. You are too young. 을 console창에 띄운다.
3.
숫자 23을 입력했다면 else if도 false이기 때문에 you can drink를 console 창에 띄운다. 그리고 else 쪽으로 넘어가서
console 창에 You can drink.를 띄운다.
else if를 통해 18세 이상 50세 이하 이런 식으로 할 수도 있다.
else if(age >= 18 && age <= 50){
    console.log("You can drink.")
여기서 &&이 우리말로 하면 그리고(and) 라는 뜻으로 18세 이상 50세 이하 이렇게 해석하면 된다.
&&는 둘 다 true 여야만 그 else if 절이 true 라는 뜻이 되고 else if 코드가 실행된다.
const age = parseInt(prompt("How old are you?"));

if (isNaN(age) || age < 0) {
    console.log("Please write a real positive number.");
} else if(age < 18) {
    console.log("You are too young.");
} else if(age >= 18 && age <= 50){
    console.log("You can drink.");
} else if(age > 50 && age <= 80){
    console.log("You should exercise.");
} else if(age === 100){
    console.log("Wow, you are wise.")    // age가 100이 아니라면을 표현하고 싶으면 === 을 !==으로
} else if(age > 80){
    console.log("You can do whatever you want.");
}
// 중괄호가 들어간다는 거 기억
// object 안과 밖의 규칙은 다르다. 밖에서는 = 을 사용하지만, 안에서는 : 을 사용
// 한 개의 특성(예, name : "daesung")을 설정하면 다른 특성도 올 수 있으니깐 그 뒤에는 ,를 사용한다.
// player의 name에 접근하고 싶을 때는 player.name 또는 player["name"]

const player = {
    name: "daesung",
    points: 10,
    fat: true,
}
console.log(player);
console.log(player.name);
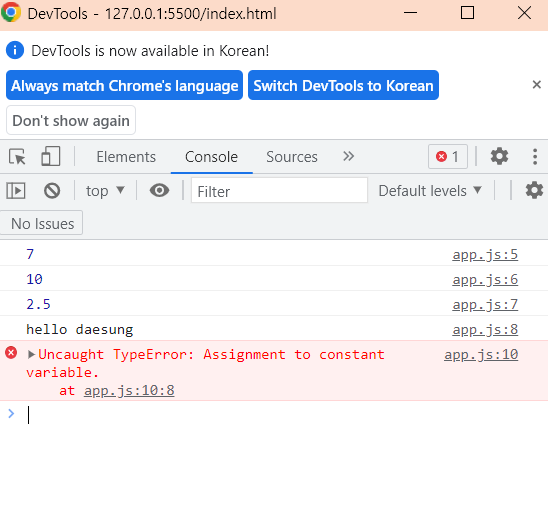
- 맞는데 우리가 바꾼 건 player 라는 object 안에 있는 fat을 바꾼 거라서 상관이 없다. 만약 player 전체의 값을 바꿀려고 한다면 에러가 뜬다.
추가도 가능하다.
const player = {
    name: "daesung",
    points: 10,
    fat: true,
}

// 별 다른 설정 없이 그냥 object를 불러서 내가 넣고 싶은 데이터 이름 값 넣으면 된다.
player.lastName = "sim";
console.log(player);
숫자를 더하는 것도 가능하다.
const player = {
    name: "daesung",
    points: 10,
    fat: true,
};
console.log(player);
player.lastName = "sim";

// 아래와 같이 코드를 쓰면 25라는 결과를 얻을 수 있다.
player.points = player.points + 15;
console.log(player.points);
fuction
> 반복해서 사용할 수 있는 코드 조각
> alert(), push() 등과 같이 괄호가 우리가 function을 실행시키는 방법
function sayHello(){
    console.log("Hello my naem is C");
}

sayHello();
> argument는 function을 실행하는 동안 어떤 정보를 function에게 보낼 수 있는 방법
function sayHello(){
    console.log("Hello my naem is C");
}

// 해석: sayHello라는 함수를 누르고 그 함수에다가 "daesung"이라는 데이터를 보낸다.
sayHello("daesung");
그럼 어떻게 받느냐??
// function sayHello ()에 nameOfPerson을 넣었는데 이건 sayHello라는 함수로 보낸 데이터가
// nameOfPerson이라는 variable 안에 저장된다는 것
// 그리고 nameOfPerson은 function sayHello() 안에 있기 때문에 function 안에서만 사용해야함.
// 만약
// function sayHello(nameOfPerson){
//   	console.log(nameOfPerson);
// }
// console.log(nameOfPerson)을 쓴다면 출력되지 않으니 조심!!!

function sayHello(nameOfPerson){
    console.log(nameOfPerson);
}

sayHello("daesung");
sayHello("sim");
sayHello("ds");
function sayHello(nameOfPerson, age){
    console.log("Hello my name is " + nameOfPerson + " and I'm " + age);
}

sayHello("daesung", 10);
sayHello("sim", 23);
sayHello("ds", 21);
function plus(firstNumber, secondNumber){
    console.log(firstNumber + secondNumber);
}
function divide(a, b){
    console.log(a/b);
}
plus(8, 60);
divide(98, 20);
그런데 console.log() 이런 식으로 하는 것처럼 player.sayHello() (player가 object일 때)와 같은 것도 가능하지 않을까?
가능하다.
// 코드 해석
//
// player를 object로 잡고
// 설정할 function을 넣는데 형식은 sayHello : function() {}
// 이런 식으로 그래서 만약에 player 안에 있는 fuction을 부를 때는
// player.sayHello() 이런 식으로 부르고 이 funtion에다가 보내고 싶은
// argument를 적고 보낸다. 그럼 function 안에 있는 otherPersonName에 저장되어서
// function을 실행한다.

const player = {
    name: "daesung",
    sayHello: function (otherPersonName) {
        console.log("hello! " + otherPersonName + " nice to meet you!");
    },
};

player.sayHello("daesung");